 Bellingham
 Siding Installation in Barkley: The Install Matters as Much as the Material
Homeowners shopping for siding tend to spend most of their attention on the product itself — the brand, the color, the texture. That's understandable, but in the Barkley area of Bellingham, how the siding goes on is just as important as what goes on. Two homes with the identical siding product can age completely differently over ten years depending on whether the crew got the drainage plane, flashing, and fastening right the first time. This page focuses specifically on siding installation as a service for Barkley homes — what the job actually requires, how we run it, and why the installation itself is where most long-term siding problems either get prevented or get built in.
Barkley sits within Bellingham's marine climate zone, close enough to Bellingham Bay that salt-tinged air is a constant, low-grade presence on every exterior surface. Add driving rain that arrives at an angle more often than it falls straight down, plus a moss season that runs long on shaded and tree-covered lots, and you get a set of conditions that punishes shortcuts. A siding installation that would hold up fine in a drier, calmer climate can start failing here within a few wet seasons if the underlying details were rushed.
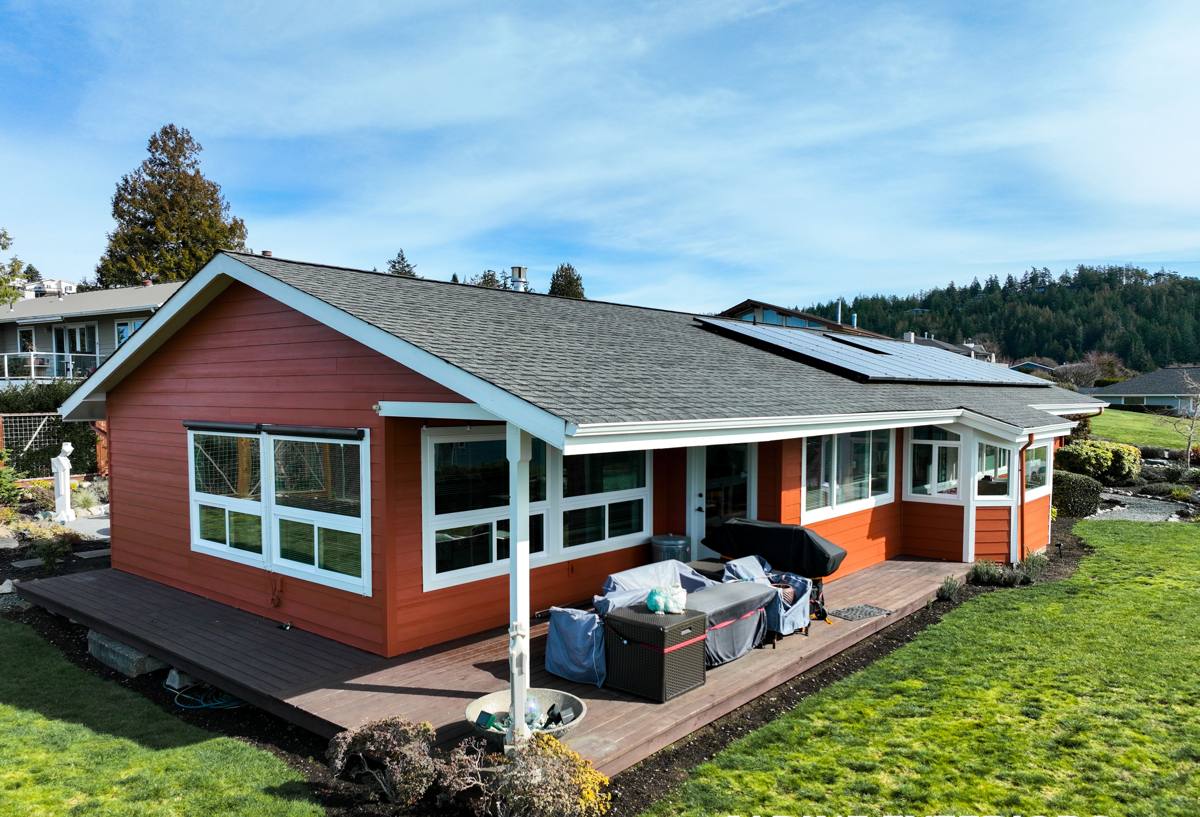
What Barkley's Climate Demands From an Installation
Salt Air at Every Fastener and Seam
Salt-laden air moving off Bellingham Bay accelerates corrosion on anything metal — nail heads, flashing, trim fasteners, and hardware. It's a slow process, which is exactly why it gets missed during installation: the effects don't show up on day one, they show up years later as rust streaking or a loosened trim piece. Correct installation means using fastener and flashing materials rated for that exposure and setting them so they're protected rather than left fully exposed to wind-blown moisture.
Wind-Driven Rain Behind the Cladding
Storms in this part of Whatcom County usually bring wind with them, which pushes rain sideways into laps, seams, and anywhere two building elements meet. A siding installation only has to resist rain falling straight down to look fine on a calm day — resisting wind-driven rain that's actively being forced into every gap is a different and much higher bar, and it's set entirely by installation detail, not by the siding product's brand name.
A Moss Season That Barely Breaks
Cool temperatures, consistent humidity, and tree cover across Bellingham give moss and algae a growing window that runs close to year-round on shaded or north-facing walls. Moss itself doesn't damage fiber cement the way it can damage a moisture-absorbent material, but it does hold water against a wall for extended periods — which makes proper clearance, drainage, and airflow behind the siding a real installation requirement, not a cosmetic afterthought.
What a Correct Siding Installation Actually Involves
A siding installation is really a stack of individual details, each one small enough to skip without anyone noticing right away — until the house has been standing through a few Bellingham winters. Here's what has to happen underneath the finished surface for the job to hold up.
The Water-Resistive Barrier and Drainage Gap
Before any siding goes up, the wall gets a continuous water-resistive barrier, lapped correctly at every seam so water sheds downward and outward rather than tracking behind it. Behind the siding itself, a drainage gap lets any moisture that does get past the cladding drain and dry out instead of sitting against the sheathing. In a climate this consistently wet, that gap is one of the details most likely to get shortcut on a rushed job, and one of the most consequential when it does.
Flashing at Every Penetration
Windows, doors, hose bibs, light fixtures, vents — every point where something interrupts the siding is a potential entry point for water, and each one needs its own flashing detail rather than a bead of caulk covering for a missing step. Caulk is a maintenance item that degrades over years; flashing is a permanent water-management detail that should still be doing its job decades later.
Fastening to Manufacturer Spec
James Hardie publishes specific nail type, spacing, and placement requirements, and following them precisely is what keeps the product performing as engineered — and what keeps its warranty intact. Fasteners set too close to a panel edge, spaced too far apart, or driven at the wrong angle create weak points that show up as splitting, popped fasteners, or water intrusion well before the siding's expected lifespan.
Clearance at Grade, Roofs, and Hard Surfaces
Siding installed too close to the ground, a patio, a deck surface, or a roofline stays damp longer after every rain and freeze-thaw cycle, and that's exactly the kind of sustained moisture exposure this climate already produces plenty of on its own. Correct clearance at every one of those transitions is a basic installation requirement that's easy to get right and expensive to fix later.
Why We Install Only James Hardie Fiber Cement in Barkley
We install one siding system, not a menu of brands, and the reasoning is directly tied to installation quality as much as the material itself. A crew that installs several different products across a range of jobs develops shallower, more general habits. A crew that installs one system consistently develops a deep, specific understanding of how that product behaves at every seam, corner, and fastener point in this exact climate. James Hardie fiber cement also tolerates sustained moisture exposure without the swelling or edge-softening that wood-based products can show, it's non-combustible, and its ColorPlus finish is factory-applied and cured under controlled conditions rather than field-painted on-site during whatever weather window happens to be available.
| Product | Installation-sensitivity trade-off in this climate |
|---|---|
| Vinyl siding | Panel seams and expansion gaps depend heavily on correct installation to keep wind-driven rain out; gets less forgiving as panels age and shift |
| LP SmartSide / engineered wood | Cut edges and fastener points need careful sealing at install, since the wood-strand core is more moisture-sensitive than fiber cement if that detail is missed |
| Primed spruce or cedar | Every cut, joint, and fastener location needs field priming and paint to stay protected — a detail that's easy to miss and expensive to maintain afterward |
| Other fiber cement brands | May not carry a climate-specific HZ formulation or the same factory-finish warranty depth backing up the installation |
That's an honest trade-off comparison, not a claim that these products can't be installed well elsewhere. In a climate this wet and this consistent, we'd rather commit to one system we can install to a genuinely high standard every time than spread that standard thin across several.
Our Installation Process, Step by Step
- Inspection and estimate: We walk the property, look at current siding condition, wall exposure, shade patterns, and any visible signs of moisture, and build the estimate around what we actually find rather than a flat per-square-foot guess.
- Tear-off and substrate check (for re-siding jobs): Old siding comes off and we inspect the sheathing underneath for rot or soft spots before anything new goes up. Covering damaged sheathing with new siding just hides a problem that keeps getting worse.
- Water-resistive barrier installation: A continuous, correctly lapped barrier goes over the sheathing, forming the primary water-management layer behind the siding.
- Flashing at every opening and penetration: Windows, doors, and any wall penetration get individually flashed before the siding goes up around them.
- Siding installation to spec: Panels or boards go up with correct fastening, spacing, and clearances, following James Hardie's published installation requirements.
- Trim, caulk, and finish detailing: Corner boards and trim go on, cut edges get sealed with Hardie's matched touch-up product rather than field-mixed paint, and joints get properly caulked.
- Final walkthrough and cleanup: We review the finished work with the homeowner and clear the site of debris and old material before calling the job done.
New Construction vs. Re-Siding an Existing Barkley Home
Installation on new construction and installation over an existing home differ enough that they're worth planning for separately.
| Factor | New construction | Re-siding an existing home |
|---|---|---|
| Starting point | Bare sheathing, clean install surface | Old siding must come off, and the substrate underneath is an unknown until it's exposed |
| Timeline predictability | Generally predictable once framing and sheathing are complete | Can shift if tear-off reveals rot or water damage that needs repair before new siding goes up |
| Cost drivers | Wall complexity, siding profile, and trim detail | All of the new-construction factors, plus tear-off labor and disposal, plus any sheathing repair |
| Common climate concern | Getting the drainage plane and flashing right from a clean slate | Finding and correcting years of accumulated moisture damage before it's covered up again |
What Drives Installation Cost on a Barkley Property
| Factor | Why it matters |
|---|---|
| Home size and wall complexity | More corners, dormers, and cutouts mean more cutting, waste, and labor time than a simple rectangular footprint |
| Sheathing condition | Rot found during tear-off adds repair scope that can't be priced accurately until the old siding is off |
| Siding profile and trim detail | Lap width, shingle or panel accents, and trim complexity all affect material and labor cost |
| Access and site conditions | Steep lots, tight setbacks, or limited staging space can add time and equipment cost |
| New construction vs. re-siding | Tear-off, disposal, and substrate repair add labor that new-construction installation doesn't require |
We walk through these factors in person during the estimate instead of quoting a number sight-unseen. Two similarly sized Barkley homes can end up with meaningfully different installation costs depending on wall complexity and what condition the substrate is in underneath the old siding.
Signs Your Barkley Home Needs a New Siding Installation
- Soft or spongy spots when you press on the siding, especially near the bottom courses or under windows
- Persistent moss or dark streaking that keeps returning on shaded or north-facing walls
- Paint that's peeling, bubbling, or wearing unevenly, which often signals moisture trapped behind the surface
- Visible gaps, warping, or separation at seams and corner boards
- Rust staining running down from nail heads or metal trim pieces
- Siding sitting too close to grade, a patio, or a deck surface with no visible clearance gap
- A musty smell or staining on an interior wall that shares an exterior wall with a suspect siding area
Why a Crew That Already Works in Barkley Matters
Barkley is a mix of newer planned-development construction and older infill homes, and that mix means installation crews run into a range of substrate conditions, wall orientations, and site layouts within a fairly small area. A crew that already works here regularly has a working sense of which walls on which lots tend to hold moisture longest, how much clearance a given site actually needs at grade, and which flashing details are most likely to matter on a specific home's orientation. If a property sits within a planned development that carries design guidelines or covenants on exterior materials and colors, we work within those constraints as part of the estimate rather than treating them as a surprise mid-project.
We also handle permitting as part of the job, which matters in a jurisdiction where requirements and processing times vary depending on the scope of the work. And being local means we're reachable years later if a warranty question or a minor issue comes up — not a name from an out-of-area lead-generation service that's gone quiet once the final payment clears.
What to Expect After Installation
A correctly installed James Hardie system in Barkley doesn't need much ongoing attention, but a few habits keep it performing the way it was designed to. Rinse siding periodically, especially on shaded or north-facing walls where moss tends to build up fastest. Keep gutters clear so overflow doesn't run down the siding face or pool at the base of a wall. Check caulking at trim joints and penetrations every year or two, since a small gap there lets water behind the siding long before any damage becomes visible on the surface. None of this is heavy maintenance — it's the kind of upkeep that a correctly installed fiber cement system rewards, rather than the ongoing painting and patching that other siding materials demand in this climate.
If you're planning a siding installation in Barkley — new construction, a full re-side, or you're just not sure what condition your current siding is really in — we're glad to walk the property and put together a straightforward estimate. No pressure, no hard sell. Use the form below to request a free estimate.